 Skip to content


Windows 10
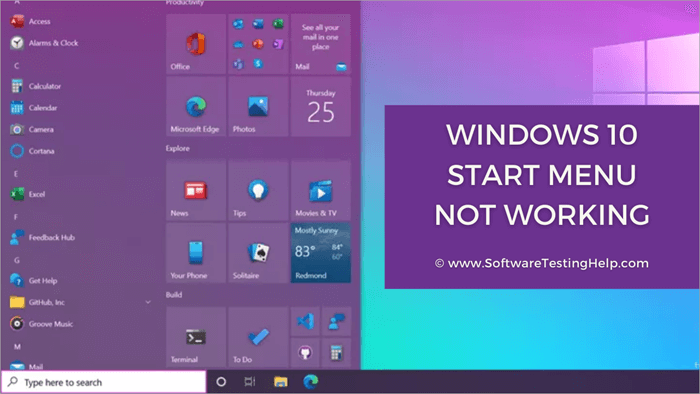
Windows 10 start menu not working
Windows 10 start menu not working
The Windows 10 menu bar not working is a common problem. And suppose the menu bar does not work. In that case, you can face difficulty performing any of these basic processes, such as refreshing the system, clicking on the start button, opening the new Windows, Opening My PC, and others. Are you facing Windows 10 menu bar not working error? And getting frustrated with this problem. Don’t worry; it’s not an unresolvable issue. In this article, I’ll discuss a few solutions to fix that issue, but finding out the cause of the problem is essential firsthand.
Causes of Windows 10 Menu Bar Not Working Issue
There are numerous causes of the Windows 10 menu bar problem. The menu bar does not open or takes more than 5 seconds. These causes include:
· Corrupt or outdated temporary data files in the Start menu
· Corrupt or outdated Cortana temporary files
· Start menu freezes due to a known glitch in Windows 10
· The Start menu is missing or crashing under your particular Windows account
· Windows Explorer is outdated or corrupted on your system
Types of Windows 10 Menu Bar Not Working Error
These errors are of various types, including
· Missing or crashing Windows 10 Start Menu
· Windows 10 stopped working
· Windows 10 Start button stopped working
· Cortana not working issue
· Windows 10 Start Menu not working error
· Windows 10 does not open
· Start Menu button freezes
How to Resolve the Windows 10 Menu Bar Not Working error?
You have to identify the cause of the problem and can solve the problem by following any of these methods:
Method 1: Restart Windows Explorer
Windows Explorer is the application to browse the file system and open programs and files. It is now called File Explorer and regulates things such as Start Menu, Taskbar, and other applications. If you are facing an issue in Windows 10 menu bar, try to resolve that issue by restarting the Windows Explorer process in the Task Manager by following these steps:
- Press Ctrl + Alt + Delete buttons together to open the Task Manager and tap the Task Manager option.
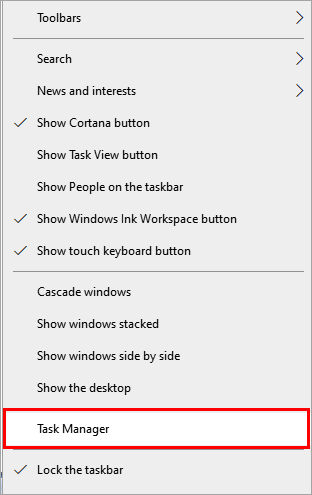
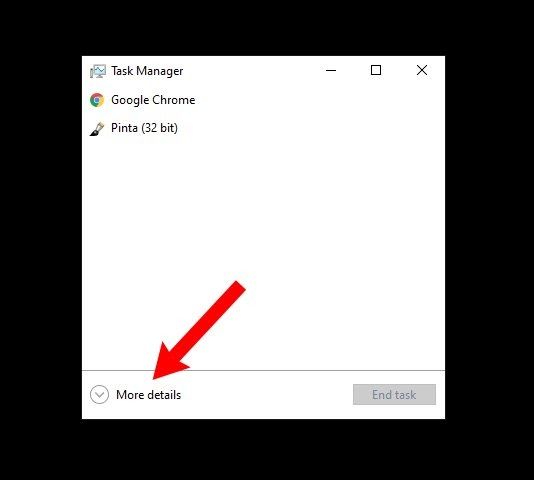
- Click on the “More details” option to see a list of open programs and background processes running on your system.
- The “windows Explorer” option will show in the list. Scroll down the list to find that process. Once you have found it, right-click the “Windows Explorer” and choose the Restart option.
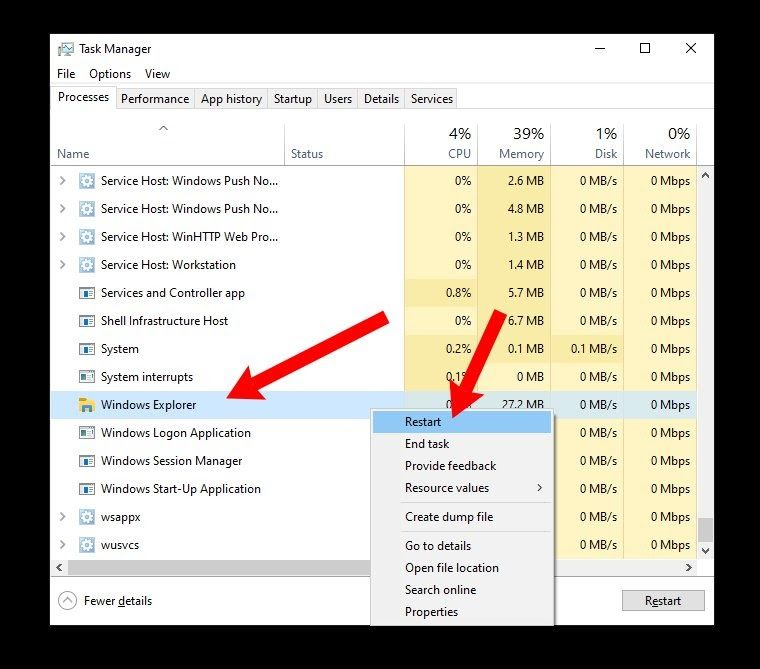
The brief flash occurs when Windows restarts Windows Explorer along with the taskbar and Start Menu. I hope this method will work to open the Windows 10 Start Menu.
Method 2: Update Drivers
The corrupted or outdated drivers can be a reason for errors within the system. Because drivers play a major part in syncing videos with the system, update the drivers to their latest version to overcome errors due to previous versions of drivers. Follow the steps to update the drivers to their advanced version:
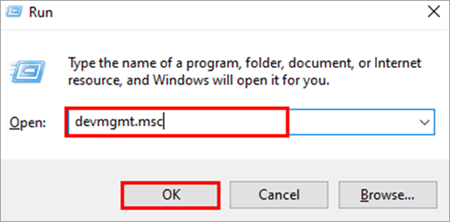
1. Click Windows +R buttons together and then enter devmgmt.msc here.
2. After that, click on the OK option.
- Finally, right-click on all the drivers and choose the Update Driver option.

Method 3: Repair Missing/Corrupt Windows System Files
Sometimes, you accidentally lose your important file, which gets deleted when the update goes wrong. You can repair corrupt or missing Windows system files if you are facing trouble in Start Menu or if core Windows apps are collapsing. You must follow these steps for this task:
- Go to Windows Command Prompt, open it as an administrator, and then run the System File Checker program.
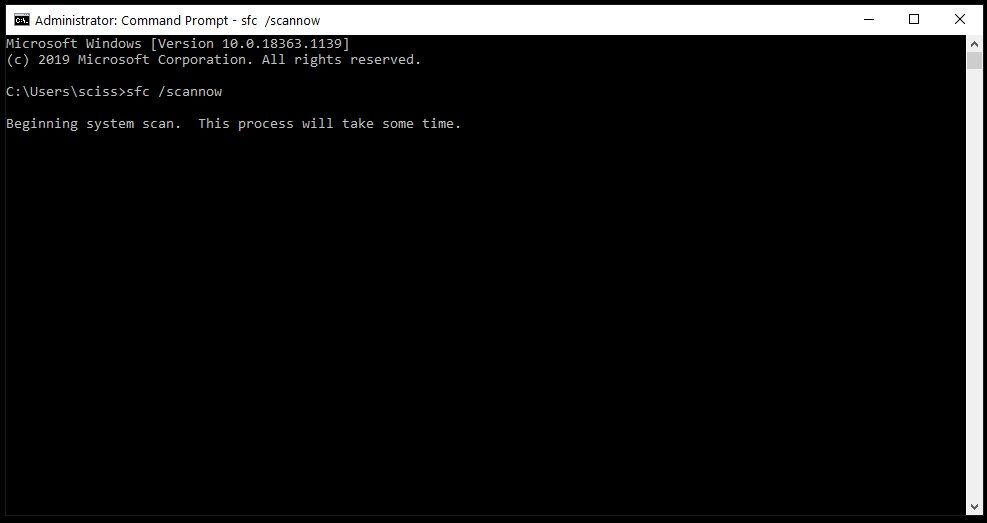
- Run the command SFC/scannow after opening Windows Command Prompt.

System File Checker checks all your files and replaces the missing or corrupt files with a preserved copy. This replacement process takes a time of almost 5-10 minutes. And avoid the window while SFC is working. The report of replaced files will be visible to you after completing the process. You will see a message if everything goes perfectly correctly.
If your corrupted or missing files get replaced, and System File Checker has done its work, then restart your computer after saving your work. Login again and open the Start Menu to see the effect of this method.
Method 4: Restart the Start Menu with the default Windows 10 apps
You can restart the Start Menu with all previously installed Windows 10 apps or install it from the Microsoft store. You must follow the steps below for this process:
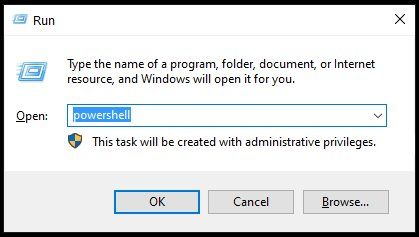
1. Open PowerShell as an administrator. There are multiple ways to open PowerShell, but you can quickly do this:
· Click Windows Key + R on your keyboard to open Run program and then enter PowerShell.
· Press together Ctrl + Shift and select the OK button.
2. Once PowerShell opens with administrative privileges, run the below-given command in the PowerShell terminal:
· Run the Get-AppX Package command to reinstall the default Windows 10 apps, Start Menu, and search bar. Windows require manifest files to run each program. This process also registers a manifest file for each reinstalled program.

· Don’t close the PowerShell window for 5-10 minutes until the process completes. Ignore the errors that pop up while the Get-AppXPackage command is running; it’s just a warning about the reason for not reinstalling a program.
· Once the command completes its process, restart your computer, log in again and try to open the Windows 10 Start Menu.
Method 5: Malware Scan
Malware is used for infected files that count for numerous system errors. These infected files slowly harm the system. In return, the system goes through several service failures. It can be a reason for your Windows 10 not working error within your system. The malware scan is crucial to perform regularly to confirm that no malware exists in your system. This malware scan frees your system from these infected files for properly working the Windows 10 menu bar.
Method 6: Clear Cortana Temporary Files
When Cortana files get corrupted, it can affect the performance of the Start Menu. Because it is integrated into the Windows Start menu, it can slow down the process when you select the Start Menu. Clearing Cortana temporary files can resolve your issue quickly. Follow these steps to clear these temporary files:
1. Click on the Windows Key + R and enter cmd.
2. Open the command prompt as an administrator by pressing Ctrl + Shift + Enter together.
3. Select Enter after typing the following commands in order. Check the Start Menu to observe the result of this solution on Windows 10 not working error.
Please be aware that you have to use these commands in this order. These commands are responsible for killing the Cortana process, removing the Cortana directory, and moving to the Cortana directory. Windows will automatically restart the Cortana process, and no manual restarting is required. The Cortana directory recreates and rebuilds after restarting. These commands would not harm your computer during the restart process.
Method 7: Reset your Windows 10 Installation
If no technique works for your Windows 10, not working problem, you can try this method as a last solution. Try factory resetting your Windows 10 installation as the last resort because it will uninstall all the installed drivers and programs. Your files, such as documents, pictures, videos, and others, don’t remain intact. It reverts the computer to the default settings. The most important thing is to have a backup file of your important documents and others using a flash drive, an online file host like Google Drive/Dropbox, or an external HDD/SSD.
It is better to have two backup files. It would help you and does not harm you. Once you have done a backup, follow these steps to factory reset your Windows Installation:
- Press the Windows Key + R and type PowerShell. After that, press the OK button.
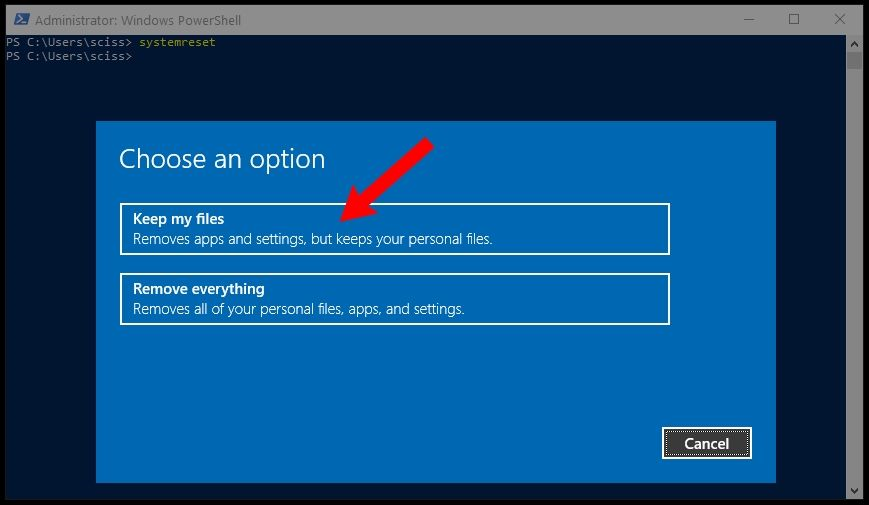
2. Run the command system reset in PowerShell to customize the Windows reset wizard.
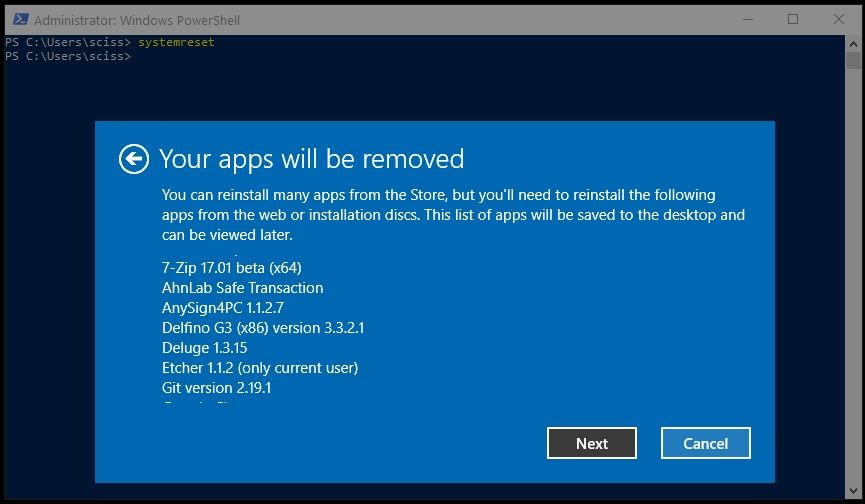
3. At last, press the Keep my files button here. The wizard scans your system and waits until it finishes. After that, the programs that are required to be removed will appear in a list form.
4. Press the Next button here and follow the instructions to factory reset your Windows 10 installation.
Create a new user account after finishing this procedure, and your Start Menu will be in working now.
Conclusion
The start menu is important in our system because it comprises the main processes like refreshing the system, opening a new tab, and many more. An error in the Windows 10 menu bar can be annoying for you. In this article, multiple methods to fix the Windows 10 menu bar not working problem have been discussed above. Identifying the reason is vital before moving toward the solution to fix the error. These methods will work, and your Windows 10 menu bar problem will resolve.
